To create precise formations, It is a good idea to use the SL edit tool's "snap" function when placing the Designer Tool and the markers.
1. Rez the Designer and place it in the center (snapping it to position) and accept the permissions pop-up that appears.
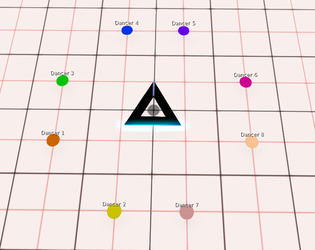
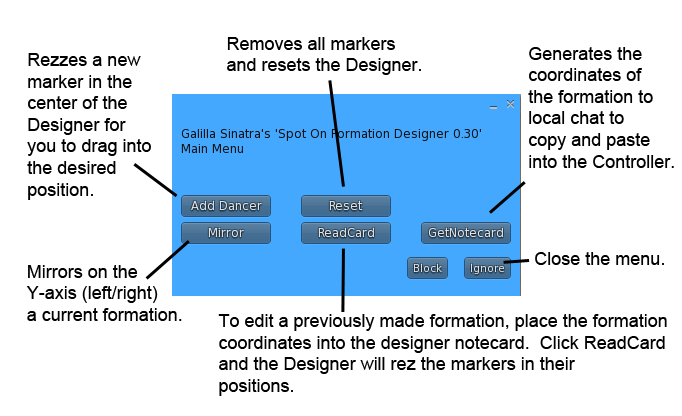
2. Left click the Designer and select Add Dancer on the pop-up menu. This will add a waypoint disk in the center of the triangle.
3. Right-click the Designer to edit, click Edit Linked Parts, and move Marker 1 to the desired position.
4. Repeat steps 2 and 3 above until you have the desired amount of Markers placed, keeping in mind Marker 1 corresponds to Mover 1, etc.
GET THE DATA
1. Once you are happy with your formation, left-click the Designer and select GetNotecard on the pop-up menu. This will generate a series of coordinates in local chat.
2. Copy the coordinates printed in chat to a notecard in your inventory and save it.
INSTALLING THE FORMATIONS
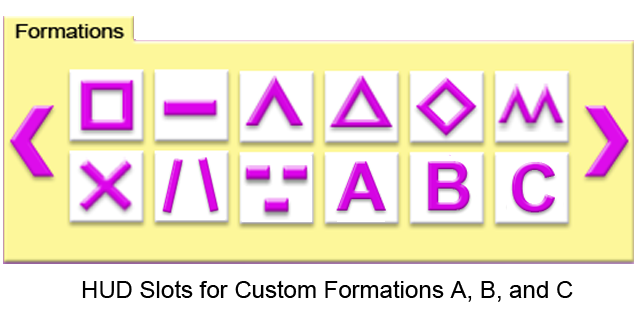
THE HUD: Icons for A, B and C are shown but you have hidden icons up to Z inside your HUD. To enable a hidden icon, delete the hashtag "#" at the beginning of the line in the "!! Configuration" notecard inside the HUD.
THE CONTROLLER: There are 10 "Formations" notecards inside of your controller. Each holds all the formations data for the number of dancers plus the Soul Train recording data. You will need to add the design data to the appropriate notecard and assign it to a HUD icon button.
We'll use 4 dancers in this example.
1. Open the Formations_4 notecard in the controller and type in the following on the first blank line on the bottom:
userA=
2. Paste the data generated from the Designer Tool directly after the equal sign.
userA=<0,1.5,0>,<0,0.5,0>,<0,-0.5,0>,<0,-1.5,0>
NOTE: You should round off the numbers that are generated in chat as they will contain 6 characters after the decimal point and this could potentially be too long a string of characters when 10 dancers are configured. If the string is too long (including spaces), it will not be read by the controller.
Example: Change this: <5.000835,1.50981,0.0> Into this: <5.0,1.5,0.0>
3. Save the notecard and close it.
Your HUD is now ready to use Button A for 4 dancers only on this controller only. It's a good idea to create a formation similar to the one you just created for all amounts of dancers. If not, Button A will be ignored for all amounts except 4 dancers.
If you intend to use this formation with other controllers, you'll need to input the data into those controllers. Controllers are copy-able so rename them something suitable for you to organize them in inventory. You can rename them while they are rezzed.
Note: User slots A, B and C are ready to use with the HUD. User slots D through Z will need to be enabled on the HUD by removing the # at the beginning of the line in the HUD !!Configuration notecard.