SPOT ON CHOREOGRAPHY TOOLS
  • HOME
  • BLOG
  • COMPARE DANCE HUDS
  • COMPARE MOVER SYSTEMS
  • UPDATES
  • ANIMATIONS & TIMES
  • FAQ
  • FLICKR
  • YOUTUBE
  • Marketplace Store
  • SL STORE
  • Mesh Products
  • ACCESSORIES
W3.CSS

Choreography Design System

Use the menu below to navigate through the Choreography Design System documentation.

FEATURES QUICKSTART VIDEOS TUTORIAL SUGGESTED WORK FLOW
Designer Ring and Waypoint Menus Mover Options Notecards Multiple Notecards Launchpad Use with Performance Director FAQ / Tips and Tricks

DESIGN YOUR FIRST ROUTE TUTORIAL


It is our suggestion that you watch the two tutorial videos first - Quick Start and you'll see how EASY this process really is.  It looks like a lot explained below, but it's really very simple. 

You only need to have basic prim editing skills to use this tool but if you do not have any knowledge of editing a prim or linkset in Second Life, please review a basic building tutorial. 

We give basic keyboard shortcuts for Windows so if MAC users are unaware of what their keyboard equivalent shortcut is, consult this list.
1.  Position the Designer Ring
Immediately upon rezzing the Designer Ring, you will receive a once-only popup box asking for permission to "link/delink."  You must choose YES on this.  It will appear in the same place as other "invites" do on your screen.
Use the Second Life Edit Tool (right-click, Edit) to move your Designer to the start position and rotate it so that the Orientation Line is pointing in the direction you will travel. 
Picture
2.  Add Waypoints
​The Designer Ring and all waypoints are a Linkset and must stay a Linkset.  Do not unlink them.  See all the Features available for use with the Designer Ring and Waypoints.
Left-click (touch) the Designer Ring once and this will bring up a menu.  Select "AddWP."  This will cause the first Waypoint to appear in the center of the Designer Ring. 
Using the SL Edit Tools with Edit Linked Parts clicked, move waypoint 1 to the first position along your desired route.  This is usually a point where you will make a turn or a pause. Continue adding Waypoints to the end of your path in the same manner however subsequent new waypoints will appear slightly offset from the last waypoint.
Picture
You always have the option to Delete a Waypoint or Add a Waypoint while you are designing anywhere along the path.
3.  Adjust Timing
Left-click a Waypoint to adjust the time it takes to travel to it, or set a Sleeptime (waiting time at that waypoint).  
Features used in this step include:  Time, Sleeptime, Autopause, Turn Time, Normalize Time, Statistics

4. Rez Mover / Get Notecard
Left-Click the Designer Ring and choose Rez Mover.  This will place a Mover in the center of the ring waiting for you to enter the data.
Left-Click the Designer Ring again and choose Get Notecard.  Follow the directions to paste the notecard data into the Mover Notecard.
You have several Configuration Options to use in this step, some required for use with Performance Director.
5.  Play the Route 
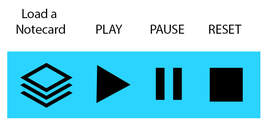
To quickly test the route, you can use the small HUD that comes with the system.  Just press the PLAY button on it and the Mover will play if it has data.
You can also use Performance Director or a chat command (with a user channel configured) to make the Mover play.  

Picture
  • HOME
  • BLOG
  • COMPARE DANCE HUDS
  • COMPARE MOVER SYSTEMS
  • UPDATES
  • ANIMATIONS & TIMES
  • FAQ
  • FLICKR
  • YOUTUBE
  • Marketplace Store
  • SL STORE
  • Mesh Products
  • ACCESSORIES