Group Formation System
Use the menu below to navigate through the Group Formation System documentation.
Use the menu below to navigate through the Group Formation System documentation.
|
HUD
The HUD tools are grouped in functional areas with the very top are being the system tools. You will need to "wear" or "add" it from your inventory. CONTROLLER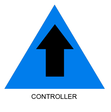
Rez this to the floor. You will need "rez rights" on the land.
Point the arrow in the direction you want to face and about 3 meters back from where you want the movers to rez. |
|
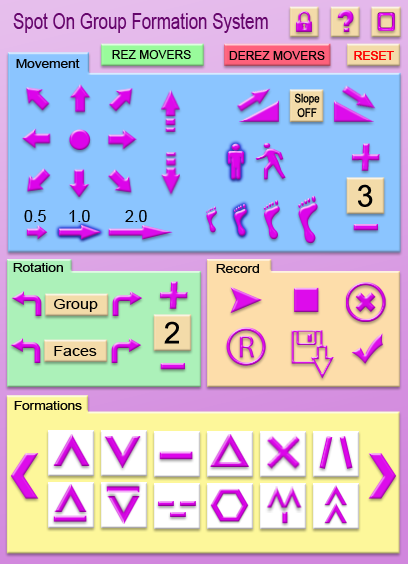
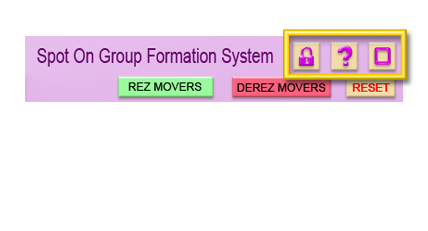
LOCK, HELP and MINIMIZE / MAXIMIZE
- RLV Lock will lock your HUD on you. RLV must be enabled in your browser. - HELP will take you to this website. - MINIMIZE and MAXIMIZE your HUD on your screen. |
|
|
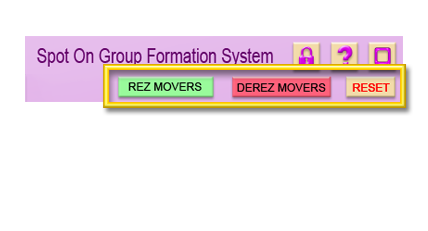
REZ, DEREZ and RESET MOVERS
- REZ MOVERS - Select how many movers to rez from a pop up menu. - DEREZ MOVERS removes all movers. - RESET MOVERS will send all movers back to the start position and formation. |
|
|
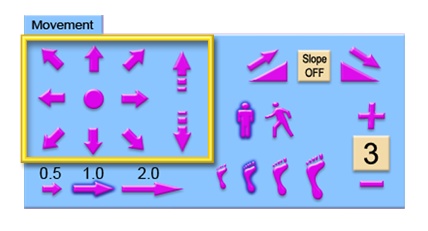
DIRECTION
Moves the group in the direction of the arrow to include straight up and down. The center dot brings the group back to the start location without changing the current formation. |
|
|
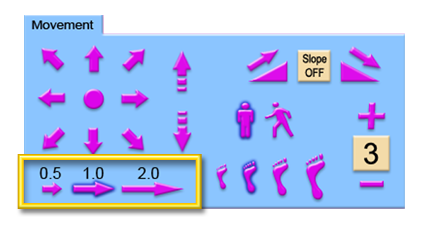
DISTANCE
The distance the group will move when a Directional Arrow is clicked. Default is 1 meter. |
|
|
FACING
The group will face forward (the default) during movement or turn toward the direction of travel. |

|
|
SIZE
The size of the group. This determines how far apart the dancers are from each other. Default is 1 meter. |

|
|
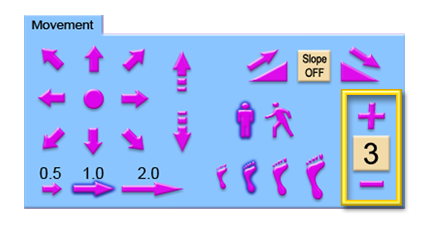
SPEED
The speed (in seconds) of travel when a directional arrow is pressed. Click the + to increase, - to decrease speed. |
|
|
SLOPE UP or SLOPE DOWN
- Press SLOPE UP (left) or SLOPE DOWN (right) to move the group UP or DOWN while also moving in the direction of the directional arrow you choose. - Press the SLOPE ON/OFF button in the center to turn it off. |

|
|
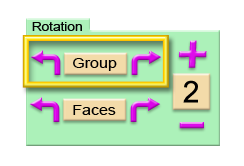
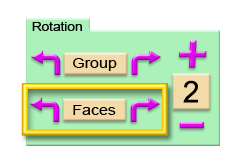
ROTATE GROUP
Click the left or right arrows to rotate the entire group. |
|
|
ROTATE FACES
Click the left or right arrow to rotate the direction the dancers are facing. |
|
|
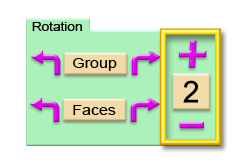
ROTATION SPEED
Click the + or - arrows to increase or decrease speed of the rotation. |
|
|
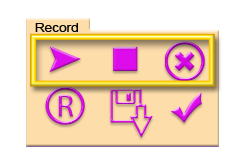
PLAY, STOP, and UNLOAD A RECORDING (macro)
- Press PLAY to begin playing a loaded macro. - Press STOP to stop a currently playing macro. - Press UNLOAD to clear a loaded macro. |
|
|
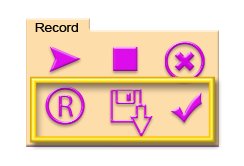
RECORD, GET and LOAD A RECORDING (macro)
- Press RECORD to begin and end recording. - Press GET RECORDING to have the macro sent to local chat for you to copy. - Press LOAD to choose a macro for play. |
|
|
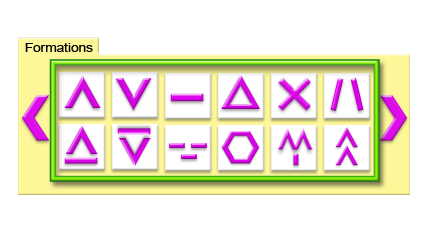
FORMATION SHAPES
Press a shape icon to move the entire group into that formation shape. |
|
|
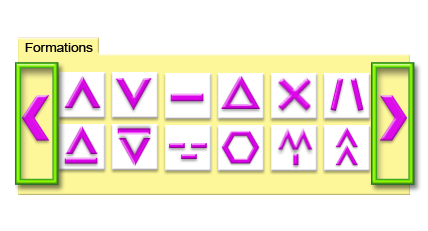
FORMATION PAGES
Left or Right Arrow pages through the 21 pre-loaded formation shapes. There are three slots (A, B and C) which are for you to create your own shape designs but you can create many more! See DESIGNING to easily create your own design shapes. |
|